
Buckets of beautiful homebrew Part 1
August 21, 2013 at 12:16 PM
 Beer, it’s a marvellous thing. There are so many varieties, each with its own unique flavour and character. Have you ever wondered how it’s made? It’s easier than you’d think. In fact, home brewing is becoming increasingly popular – we know this as many of our food grade homebrew buckets are bought for this most worthwhile of hobbies. It’s great fun, easy to set up and works out to be really good value.
There’s nothing quite like the pride you feel taking that first frosty sip of your new batch of home-brewed beer. All you need is the right kit, some spare room (basements, garages and sheds are ideal), H&O home brew buckets and a little patience. Before you know it, you’ll be cracking open a cold one and wiping the foam from your smiling lips.
But before you can start thinking about what you’ll call your foamy new creation, you need the know-how. And that starts with getting the right gear for the job.
Despite what you may have heard, you don’t need loads of fancy equipment to make beer. There are online stores that specialise in the art of home brewing, and you can easily pick up a starter kit for around £70.
However, if you’d prefer to do a more thorough job, here is a quick summary of the essentials you need for a successful brew. Every item of equipment is available through all good homebrew shops and websites:
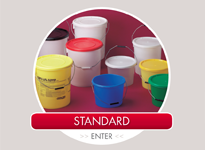
- large mixing bucket – at least 12 litres in size. The larger the container, the fewer spillages. You can buy large, food grade buckets online via our shop.
- tubing and a clamp – this is used for siphoning and bottling your beer. A six-foot length of 3/8” food grade plastic tubing is ideal.
- airtight fermenting bucket or glass carboy – a purpose made 20litre bucket or glass carboy for fermenting your beer. For the process to work successfully, it needs to be airtight, so make sure you buy the correct type.
- air lock and stopper – sized to fit your fermenting bucket.
- bottle filler – an attachment to help fill your bottles. Make sure it’s the right size for your tubing.
- floating thermometer – a good quality floating thermometer with a range of 0-100 C/32-220 F.
- bottles – fifty brand new, good quality 355ml beer bottles. Don’t use twist top bottles.
- bottle caps – fifty brand new bottle caps to keep your beer nice and fresh.
- bottle capper – this simple machine safely and securely puts the lids on your beer bottles.
- bottle brush – a long, thin, loop shaped brush to clean inside you beer bottles. This comes in handy when you want to reuse your bottles.
- sanitising solution – because the brewing process involves fermentation, beer is prone to infection. Therefore, you must keep all equipment thoroughly sanitised between uses. Specialist brewers disinfectant is available, but diluted household bleach will do the job as long as you rinse all equipment thoroughly afterwards.
There are many different ingredients you can use to make beer, and many ways to do it, each producing their own unique flavour. You may prefer pale ale or a rich porter, but here are the ingredients to make a batch of traditional brown ale. If you fancy something different, there are many websites you can visit to download recipes for the more weird and wonderful varieties of beer.
The following ingredients will yield around 20litres of beer:
- 2.7kgs of unhopped malt extract – this is the fresh, moist variety of malt but dry malt extract is an acceptable alternative.
- 2.25ozs of hops – hops add bitterness to your beer and most come in pellet form. Leftover pellets can be stored in your freezer for later use.
- 1 package (around 12gms) of ale yeast – this activates the fermentation process. Liquid yeast gives the best quality beer.
- 140gms of priming sugar – corn sugar is perfect.
Now you know the equipment and ingredients you need, it’s time to roll up your sleeves and start brewing.
A 5 step overview
Brewing the Beer
Start by pouring the malt extract and hops in to a large saucepan with plenty of water. Bring to the boil and simmer for an hour, sterilising the malt and releasing the bitter flavours of the hops. It’s common practice to steep grains in the mixture prior to boiling, thus adding colour and additional flavours.
Cooling and Fermenting
Leave the hot liquid (or ‘wort’ as it’s referred to in the trade) to cool until it reaches room temperature. Next, siphon it in to your fermenter and top it up with fresh, cool water until it reaches the 20litre mark. Making sure that the mixture is at room temperature, add the yeast. Finally, place the lid on the barrel or bucket and leave to ferment. This takes 1-2 weeks.
Priming and Bottling
After the fermentation period has elapsed, your beer is ready to bottle. You start by siphoning the beer from your fermenter to a different container. This is when you want to stir in the priming sugars. Next, siphon the beer in to individual bottles, firmly securing the bottle caps with your capping machine.
Ageing
Although it may be tempting to crack one open as soon as you’ve popped the caps on, your beer needs to age for a further 2-6 weeks. During this time, the yeast will continue to ferment the priming sugar, creating carbon dioxide. This is what adds the bubbles to your brew. In addition, sediments generated by excess proteins and yeast will cascade to the bottom of the bottle, releasing the rich flavours of the beer. If you have an abundance of patience, beer reaches its peak flavour after several months of aging. But if you are keen to try the fruit of your labours, a month should probably do.
Drinking
When you can resist the temptation no longer, grab a few bottles and stick them in the fridge until chilled. When the bottle is looking nice and frosty, remove the cap and take a nice long gulp. Make sure you savour the taste though; it’s the sweet taste of success.
And that’s all you need to know to get started. Enjoy!
Add Pingback


