


The H&O guide to Homebrewing - Part 3
October 30, 2013 at 11:10 AM
 Hello and welcome to the third and final part of the H&O Plastics guide to brewing your own beer.
In the first two instalments, we looked at the equipment and ingredients you need, and the brewing and fermenting processes. This edition, we take you through the last stages of creating your own delicious homebrew: priming, bottling, aging and (our favourite part) drinking!
So, you have brewed your beer and it has been fermenting for a few weeks in your airtight plastic bucket. Now it’s time to get it bottled. But first, you need to prime it.
Priming and Bottling
Your beer has spent the last few weeks infusing hops and yeast, but there’s one ingredient left to add. Priming sugar is the last element of the recipe and is the catalyst that helps your beer carbonate.
But before you think about priming and bottling your beer, it’s essential that you sterilise every piece of equipment you intend to use.
At this stage, your beer is very delicate. Even post fermentation, beer is susceptible to infection and spoiling, and the flavour can easily be ruined either by bacteria or the introduction of an excess of oxygen (by splashing or overly vigorous stirring). You will need to sterilise your large plastic mixing bucket with brewers cleaning agent (available through specialist websites) or a very weak bleach solution, ensuring that you rinse it thoroughly afterwards. Soak your beer bottles in the same cleaning agent, removing any debris inside the bottles with a bottle brush. You can also run the bottles through your dishwasher, but if you choose to use this method make sure you do it without detergent because any residue will ruin the flavour and head retention of your beer. Lastly, sterilise any stirring tools and siphoning equipment you are using.
Next, carefully siphon your beer into your mixing bucket. To preserve the integrity of the flavour, it’s important not to splash the liquid around. Gently stir in two thirds of a cup of priming sugar (corn sugar is the best), making sure that as little air as possible is added to the mix. Once the sugar has dissolved, it’s time to siphon the beer in to your bottles. Using your bottle filler, fill the bottles ensuring that you leave at least an inch at the top of your bottles to allow for fermentation and carbonation. To avoid spillages, it’s a sensible idea to add the bottle caps as you go, securing them with your bottle capper.
Ageing the ale
 The aging process is all about patience. This stage allows the priming sugar to carbonate the beer, and all excess proteins, tannins and sediment will drop out, settling at the bottom of the bottle. Although most beers are perfectly drinkable after only a few weeks, the average homebrew takes between eight and fifteen weeks to reach its optimum flavour. It can be frustrating to wait this long, but resist the temptation to crack your bottles open after a fortnight and you will enjoy a beer that’s smoother, richer and more flavourful.
After your have bottled and capped your beer, you need to find a place to store them. To allow for full carbonation, the bottles should be kept at approximately room temperature for the first two weeks. After this, they should be moved to somewhere cool and dark; your garage or shed is perfect. If you have a large refrigerator, the cooler temperature will help your beer sediment quicker.
Drinking your homebrew!
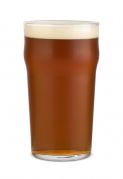
At last, the time has come to sample the fruits of your labour. This is undeniably the most enjoyable part of the brewing process and is a great reward for all of the hard work you have put in over the weeks and months. Whether you prefer to drink your beer chilled or at room temperature, there is a technique to drinking homebrew. The aging process will have left sediment at the bottom of your beer bottle. Although there is nothing harmful about this residue, it has a rather bitter taste and is best avoided. Slowly pour your beer in to a glass, leaving a millimetre or so of liquid containing the sediment still in the bottle. Take a moment to appreciate the colour, aroma and head of the beer before you take your first sip. Allow the beer to wash over your taste buds and appreciate the subtle hoppy flavour. Perfect home-brewed deliciousness!
We hope you have found the series interesting, enlightening and fun, and that you have been inspired to try making your own homebrew. And remember that you can reuse all of your equipment to make your next batch.
Add Pingback
RL Plastics Ltd | Britannia House | Dock Road | Birkenhead | CH41 1DF
T: 0151 639 0002 | F: 0151 639 0006 | E: sales@ho-plastics.co.uk